Swift watchOS 簡単なアプリを作ってHealthKitに接続してみる
iOSとwatchOSとの連携を行って、watchOSの概要をちょこっと調べたので、簡単なアプリを作成し、HealthKitに接続してみる。
1.画面構成
プロジェクトを作成すると、ストーリーボードに4画面表示されているのだが、ちょっと見た感じだと、メインアプリ、コンプリケーション、通知など、対応するソースコードの基底クラスを見るとアプリの形態ごとのイメージのよう。
今回は左上に表示されている、WKInterfaceController を継承したメインアプリに、Picker、ボタン、ラベル、テキストボックスを配置する

2.ソース
Pickerで、体重を選択
ボタンで確定
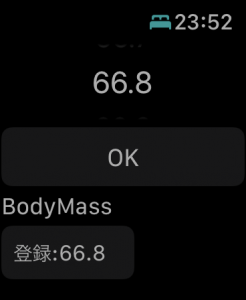
ラベルに確定した体重を表示
テキストボックスに、HealthKitの状況を出力させる
import WatchKit
import Foundation
import HealthKit

class InterfaceController: WKInterfaceController {

    @IBOutlet weak var bodyMassPicker: WKInterfacePicker!
    var items:[WKPickerItem] = []
    @IBOutlet weak var selectedBodyMassLabel: WKInterfaceLabel!
    var selectedBodyMass:String?


    @IBOutlet weak var healthKitStatus: WKInterfaceTextField!

    var healthStore : HKHealthStore?

    override func awake(withContext context: Any?) {
        // Configure interface objects here.
        if HKHealthStore.isHealthDataAvailable() {
            self.healthStore = HKHealthStore()

            let allTypes = Set([
                HKQuantityType.quantityType(forIdentifier: .bodyMass)!
            ])

            self.healthStore?.requestAuthorization(toShare: allTypes, read: allTypes) { (success, error) in
                var result = ""
                if success {
                    result = "アクセス許可: \(String(describing: success))"
                } else {
                    result = "\(String(describing: error?.localizedDescription))"
                }
                DispatchQueue.main.async {
                    self.healthKitStatus.setText(result)
                }
            }

        } else {
            self.healthKitStatus.setText("ヘルスデータ利用不可")
        }

        self.items.removeAll()
        for num in stride(from: 60, through: 80, by: 0.1) {
            let item = WKPickerItem()
            item.title = "\(num)"
            items.append(item)
        }
        bodyMassPicker.setItems(items)
        bodyMassPicker.setSelectedItemIndex(100)
    }

    override func willActivate() {
        // This method is called when watch view controller is about to be visible to user
    }


    override func didDeactivate() {
        // This method is called when watch view controller is no longer visible
    }


    @IBAction func selectBodyMass() {
        selectedBodyMassLabel.setText(self.selectedBodyMass)
    }

    @IBAction func selectBodyMassPicker(_ value: Int) {
        self.selectedBodyMass = items[value].title
    }
}
3.トラブルシュート
とりあえず、実行したら結果のテキストボックスに、Missing com.apple.developer.healthkitentitlement. というエラー


そういえば、iOSの時に、HealthKitの設定したときに色々設定したなと思って見直す。
Capabilities には、watchOSから設定できないようなので、
WatchKit Extension.entitlements に HealthKitを追加して、YESにする。

4.実行
ちゃんと、承認画面がApple Watchにも表示された。
権限を付与すると、

結果に、「アクセス許可:true」が想定通り表示された!OK