Firebase CLI プロジェクトの Google Cloud Functions へファイルをアップロードして、Google Cloud Storageへ保存するコードをTypeScriptで書く

1.環境整備
Firebase CLIプロジェクトの生成は、この辺。
Firebase CLI プロジェクトで、Functionsを有効にすると、functions ディレクトリが生成されるので、その中で、以下のnpmパッケージをインストールする。
- Google Cloud Storage
- Busboy : HTMLのFormを解析するNode.jsモジュール。@types/busboy はTypeScript用の型定義
cd functions
npm install @google-cloud/storage --save
npm install busboy --save
npm install @types/busboy --save
2.Cloud Storageのバケットを定義
Firebase コンソールからStorage を選択、バケットを追加する。

3.Functionsのコード
- Cloud Function でHTTPマルチパートデータを送信する を参考に、TypeScriptでCloudStorageに書き込む
import * as functions from 'firebase-functions';
import * as admin from 'firebase-admin';
admin.initializeApp();

import * as path from 'path';
import * as os from 'os';
import * as fs from 'fs';
import * as Busboy from 'busboy';

export const helloStorage = functions.https.onRequest((request, response) => {
    if (request.method !== 'POST') {
        response.status(405).end();
        return;
    }

    const bucket = admin.storage().bucket("gs://Cloud Storage のバケットURL");
    const busboy = new Busboy({headers: request.headers});
    const tmpdir = os.tmpdir();

    const fields: {[key:string]:string} = {};
    const uploads: {[key:string]:string} = {};

    busboy.on('field', (fieldname, val) => {
        console.log(`Processed field ${fieldname}: ${val}.`);
        fields[fieldname] = val;
    });

    const fileWrites: Array<Promise<any>> = [];

    busboy.on('file', (fieldname, file, filename) => {
        console.log(`Processed file ${filename}`);
        const filepath = path.join(tmpdir, filename);

        console.log(`Filepath ${filepath}`);
        uploads[fieldname] = filepath;

        const writeStream = fs.createWriteStream(filepath);
        file.pipe(writeStream);

        const promise = new Promise((resolve, reject) => {
            file.on('end', () => {
                writeStream.end();
            });
            writeStream.on('finish', resolve);
            writeStream.on('error', reject);
        });

        fileWrites.push(promise);
    });

    busboy.on('finish', async () => {
        await Promise.all(fileWrites);

        for (const file in uploads) {
            const filepath = uploads[file];
            console.log(`Finish filename:${filepath}`);

            await bucket.upload(filepath)
            .then(
                res => console.log(`GCS res : ${res}`)
            )
            .catch(
                () => console.log("GCS ERROR")
            );
            console.log(`UN LINK FILE : ${filepath}`);
            fs.unlinkSync(filepath);
        }
        response.send();
    });

    busboy.on('error', async () => {
        console.log("busboy on error");
    });
    busboy.end(request.rawBody);
});
4.Functionsデプロイ
firebase deploy --only functions
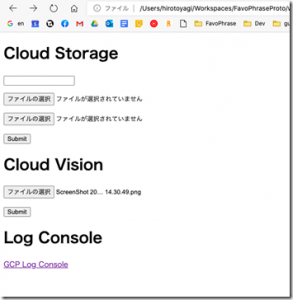
5.ファイルアップロードテスト用HTML
<!DOCTYPE html>
<html lang="ja">
<head>
<meta charset="uft-8">
</head>
<body>
<form action="https://Cloud Functions の URL/helloStorage" method="POST" enctype="multipart/form-data">
	<p><input type="text" name="txt_param1"></p>
	<p><input type="file" name="upload_file1"></p>
	<p><input type="file" name="upload_file2"></p>
	<p><input type="submit" value="Submit"></p>
</form>
</body>
</html>
6.実行
ファイルアップロードテスト用HTMLを起動、適当にファイルをアップロード

6.Google Cloud Platform のログビューアで確認
- 上記ソースで、console.log に書き出した、form パラメーターやテンポラリのファイル格納パスなどが想定通り出力された!

7.Cloud Storageにアップロードされた

次は、Cloud Vision APIにつなぐぞ。