Python ElementTree でAmazon APIを利用する
この間、SAXパーサーでAmazon Product(以下略)を解析したので、更なるXML柔軟利用を目指してXPathを使ってみる。
Amazon APIへのRESTリクエスト作成はこちら。また、最新のソースはこのあたりを
ElementTree 参考URL
- http://pythonjp.sourceforge.jp/dev/library/xml.etree.elementtree.html
- http://www.python.org/doc/current/library/xml.etree.elementtree.html
- http://www.python.jp/doc/release/lib/module-xml.etree.ElementTree.html
XPath の構文
注意点
- xmlns属性があると、タグを指定するときに、’//tag_name’ などと書くことができずに、’//{http://xmlns_attribute_value}tag_name’のようにいちいち記述する必要がある。
- 要するに、elm.find(‘./ItemAttributes/Title’) と書くことはできず、elm.find(‘./{http://webservices.amazon.com/AWSECommerceService/2005-10-05}ItemAttributes/{http://webservices.amazon.com/AWSECommerceService/2005-10-05}Title のようにする必要がある’)
#!Python2.6
# -*- coding: utf-8 -*-

import amazon_ecs  # 自作モジュールをインポート
import urllib2
from xml.etree import ElementTree

# xmlns を付加したタグ名を返す
def qn(tag):
    return ElementTree.QName(ns, tag).text

ns = r'http://webservices.amazon.com/AWSECommerceService/2005-10-05'

# xmlnsが指定されている場合、タグを{xmlnsの値}タグ名 といちいち書く必要があるため、そのように展開したものを保持しておく
# ./{http://webservices.amazon.com/AWSECommerceService/2005-10-05}ItemAttributes/{http://webservices.amazon.com/AWSECommerceService/2005-10-05}Title
q_items  = './/{0}'.format(qn('Item'))
q_title  = './{0}/{1}'.format(qn('ItemAttributes'), qn('Title'))
q_author = './{0}/{1}'.format(qn('ItemAttributes'), qn('Author'))
q_asin   = './{0}'.format(qn('ASIN'))
q_url    = './{0}'.format(qn('DetailPageURL'))
q_img    = './{0}/{1}'.format(qn('SmallImage'), qn('URL'))

# Amazon Product Advertise API リクエスト URLを生成
operation = amazon_ecs.ItemSearch()
operation.keywords('手塚 治虫')
operation.search_index('Books')
operation.response_group('Large')
request = operation.request()
print 'REQUEST : {0}'.format(request)

# ElementTreeを生成
root = ElementTree.parse(urllib2.urlopen(request)).getroot()
# XPathを使用してElementTreeを解析
items =  root.findall(q_items)
for item in items:
    print '-' * 100
    print 'TITLE : {0}'.format(item.find(q_title).text)
    print 'AUTHOR : {0}'.format(item.find(q_author).text)
    print 'ASIN : {0}'.format(item.find(q_asin).text)
    print 'URL : {0}'.format(item.find(q_url).text)
    print 'IMG : {0}'.format(item.find(q_img).text)
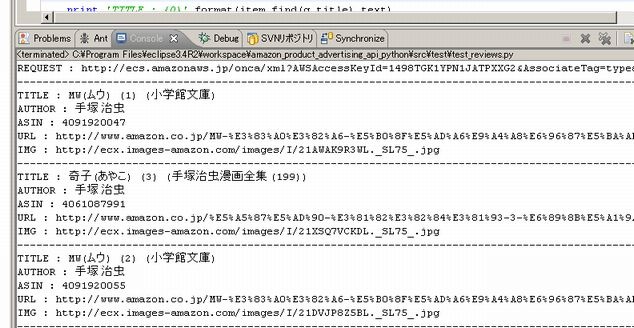
PyDevで走らせた結果